String Trimmer Maintenance
In the world of lawn care and yard maintenance, string trimmers are excellent tools for achieving that manicured, professional look. Like any power tool, taking care of your string trimmer is essential for optimal performance and longevity, so you get that perfect trim with every use.
Here, we’re showing you everything you need to know about string trimmer maintenance – from how to keep components clean and functional to important safety measures and basic string trimmer storage tips.
Key Points of String Trimmer Maintenance
Performing essential string trimmer maintenance ensures your tool operates and lasts. Regularly cleaning your string trimmer after each use prevents debris buildup that might reduce efficiency or even cause damage. Whether you have a gas or a battery-powered tool, checking and replacing common components helps guarantee a smooth operation.
Remember: Before working on gas trimmers, make sure your tool is off and the spark plug wire is disconnected. As an extra precaution, you should also empty the fuel tank. For battery-powered tools, it’s always a good idea to remove the battery or unplug it from the charger.
Fuel Lines
Because delivering fuel to the engine is essential for a steady supply of power, fuel lines play a pivotal role in how gas-powered string trimmers function. Regular inspection can prevent potential issues – like leaks, cracks, or blockages – that can disrupt fuel flow and hinder performance.
To maintain a string trimmer fuel line:
- Examine the fuel lines looking for signs of damage or deterioration
- Replace a line if you find any cracks, leaks, or blockages
- Check the purge valve isn’t leaking or cracked
If you need to replace the fuel lines:
- Make sure the trimmer is off and the fuel tank is empty
- Carefully disconnect the old line, noting the routing
- Check that the fuel filter is in good working order; replace if necessary
- Install the new line and check for secure connections to both the tank and the engine
- Refill the fuel tank and test the trimmer for functionality
Spark Plug
The spark plug ignites the fuel-air mixture within the string trimmer’s engine. It’s essential for reliable starting and efficiency. Spark plug maintenance on a gas trimmer is simple once you know a few key tips.
To clean your trimmer’s spark plug:
- Turn off your trimmer and wait for any moving parts to come to a complete stop
- Remove the spark plug cover or the boot and wire at the end
- Clean around the plug so debris doesn’t fall into the engine when you remove it
- Using a socket wrench fitted with a spark plug socket or a spark plug wrench, loosen and remove
- Check for damage or any blackening or carbon buildup
- The spark plug tip should be gray, not covered with oil
- If dirty, clean
- If damaged or worn, replace
To replace a trimmer spark plug:
- Using a feeler gauge or spark plug gap tool, check the gap distance – the space between the center and ground electrodes – if needed, adjust
- Replace or install a new spark plug and tighten – be careful not to overtighten
- Connect the boot and wire or cover
Battery
With just a little bit of care, your battery-operated string trimmer will always be ready to trim. The following guidelines will keep your ECHO string trimmer battery in excellent condition, so your tool is reliable when you need it.
Tips for string trimmer battery maintenance:
Charging best practices:
- To get the most out of your string trimmer, always use the proper ECHO charger.
- Charge batteries before each use, but don’t overcharge – remove the battery from the charger once the indicator light shows a full charge.
- Avoid partial charges as much as possible.
- Keep the charger in a cool, dry place.
Battery maintenance:
- Using your tool regularly can help keep the battery in good condition.
- Make sure the battery contacts are free from dust and debris to ensure a good connection.
- Don’t store your battery in extreme heat or cold.
Storage recommendations:
- Clean your battery before storing it.
- Store in a cool, dry place, away from moisture and direct sunlight.
- Detachable batteries should be removed from your tool and stored separately.
- Do not place heavy items on top of a string trimmer battery when storing.
Trimmer Line and Head
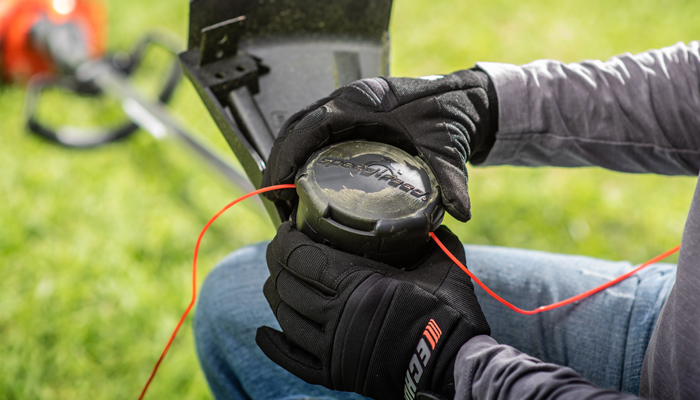
Regular maintenance of your string trimmer head and line will allow efficient cutting with every use. Start by checking that the trimmer head is in good working order and tightly fastened to the shaft. Damaged or loose heads can cause inefficient cutting and pose a safety risk during operation. If your trimmer head shows signs of wear or damage or you can’t tighten it any longer, it’s likely time to replace it.
Replacing a trimmer head:
- Make sure your trimmer is turned off and disconnected from its power source
- Find the bolt or nut that secures the trimmer head to the shaft
- Using a wrench or socket wrench, loosen and remove the fastener
- Carefully remove the old trimmer head
- Align the new head with the trimmer shaft and check that it’s positioned correctly
- Secure the new head in place by replacing and tightening the retaining bolt or nut
- Reconnect the trimmer to a power source and test the new head before using it in your yard
You’ll also occasionally need to replace the line on your string trimmer. This is a simple task that will help ensure optimal performance.
Replacing a trimmer line:
- Disconnect string trimmer from its power source
- Remove trimmer head
- Take the spool out and wind a new line, following directional arrows
- Replace spool back into head and pull the ends of the lines through the eyelets
- Securely reattach the trimmer head
- Check that the line feeds correctly before using
Maintaining your string trimmer is effortless when you have everything you need – ECHO trimmer accessories include heads and lines so you’re back in business in no time.
Learn everything you need to know about your ECHO string trimmer by watching our quick, helpful video series on this popular tool!
Air Filter
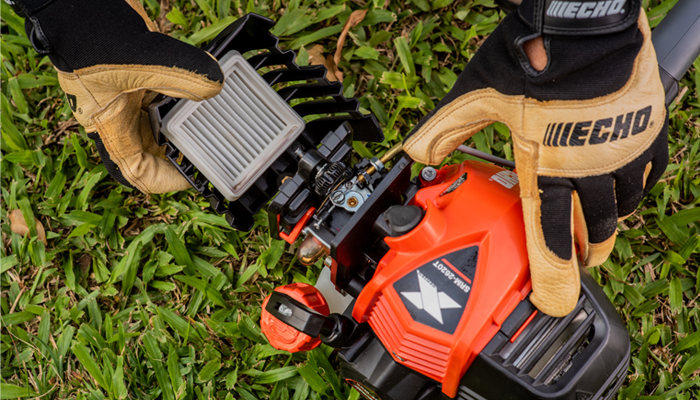
Air filters protect your trimmer by preventing dust, dirt, or debris from entering either the combustion chamber (for gasoline-powered trimmers) or the motor (for battery-powered trimmers). They are vital for maintaining engine efficiency and longevity.
To maintain and replace your trimmer’s air filter:
- Remove the air filter cover so you can inspect for dirt, debris, or damage
- Check for discoloration or visible buildup that indicates clogging
- If your air filter is dirty or clogged, remove it
- You can try to dislodge loose debris by gently tapping the filter on a flat surface
- Using compressed air, blow through the clean side to the dirty side to prevent contaminants from pushing further into the filter
- Heavily soiled filters may need to be washed with a mild detergent and water (allow the filter to completely dry before reinstalling)
- Occasionally, you’ll need to replace your air filter, especially if it’s damaged, excessively dirty, or can’t be cleaned
- Install the new filter, ensuring a proper alignment and sealing

Safety Measures During Maintenance
Several safety measures are important to remember when doing maintenance on your string trimmer. Wearing appropriate gear – including gloves and eye protection – helps shield you from flying debris that may result in cuts and abrasions. Ear plugs can reduce the impact of noise on your hearing.
You also want to be cautious of engine components that might be hot after extended use – always allow your tool to cool down completely before starting any maintenance tasks.
You won’t go wrong with a gas-powered chainsaw for tough, large jobs that demand optimal power. These saws have a hearty roar and robust design and build that doesn’t shy away from bigger trees or thick branches.
Significant benefits to the gas-powered chainsaw include freedom from cords and charging, smooth operation, and fast starts. Many of today’s models even offer low-vibration and air-cleaning technology, making comfort and reduced wear and tear another plus.
String Trimmer Storage
Proper string trimmer storage is crucial to protect your tool from damage and corrosion so it maintains power season after season. During long periods of non-use, store your trimmer in a clean, dry, well-ventilated area that’s not in direct sunlight or exposed to excessive moisture.
Other tips for properly storing your string trimmer include:
- Allow your tool to cool completely before storing
- Thoroughly clean after each use to remove dirt, grass, and debris
- Briefly inspect your tool for damage, including cracks, worn parts, or loose fasteners
- If storing for any length of time, empty the fuel tank in a gas trimmer or remove the battery in a battery-powered trimmer
- A protective cover can shield your trimmer from dust, debris, and moisture
- Store your string trimmer off the ground on a shelf hook to prevent moisture buildup
ECHO Makes String Trimmer Maintenance Easy
String trimmers are versatile, efficient tools that help you achieve that perfectly manicured lawn or garden by offering precision trimming in areas your lawnmower and other tools can’t reach. Proper care and string trimmer maintenance is vital for keeping your trimmer performing just as well as it did the first time you used it – and ECHO YOUCAN™ Maintenance Kits are the perfect way to get started.
ECHO has everything you need to keep your trimmer and any other power tool in great shape with every use, year after year. Check out all our trimmer and brushcutter accessories – from trimmer lines, to attachments, to blades, to conversion kits, spool heads, and blade protectors – ECHO trimmer and brushcutter accessories help you get the most from your outdoor power equipment.
